300x250 AD TOP

Showing posts with label Tips. Show all posts

Sunday, 4 March 2012

Tagged under: ,

Multiple File Selection in Windows 7


Whenever you have to select multiple files, you need to keep the [Ctrl] key pressed while clicking on filenames. How many times has it happened to you that you let go of the
[Ctrl] key before selecting another file and your entire selection was lost? It’s irritating when sorting large number of files. Windows 7, however, comes to your rescue with checkboxes that allow you to select files without having to hold the [Ctrl] key.
  • Once in a folder, Click on
  • Organize > Folder and Search Options.
  • Go to the View tab.
  • Under Advanced settings, check the item labeled “Use check boxes to select items”
  • Press Ok and you are done.


Tagged under: ,

Windows 7 System Restore


This time Microsoft has worked really hard to come up with improved System Restore in windows 7, once you explore power of System Restore feature in Windows 7, i am damn sure you will start loving Windows 7 right now.

Windows 7's System Restore is different from earlier Windows versions.In Win 7 , it  will list all Previous versions of selected file or folder from various restore points. You can simply copy, restore or open to see files from Previous Restore point.So there is no need of full system restore. If you have accidentally deleted any specific file or folder you can  simply use “Restore previous versions” feature to copy or restore to its original state.
Eventhough Restore points can take up several gigabytes of hard drive space.If you are disabling System Restore  ,you can reclaim the space but  by doing so, you will not be able to restore your computer to a given point in time. An alternative you can  delete all the restore points except for the most recent one. To accomplish this in Windows 7:

1. Press Windows key + R and  type Cleanmgr.exe and press Enter.

2. Select the appropriate drive letter from the list and click OK.
3. Click Clean up system files. Disk Cleanup restarts in elevated mode.

4. Select the appropriate drive letter from the list and click OK.
5. Click the More Options tab.
6. Under System Restore and Shadow Copies, click Clean up.

7. Click OK.
Tagged under: ,

How to Solve - Display Properties Tab Missing.


When   you are trying to change the “Display Properties"  on Desktop  sometimes you can view only "Themes" or few “tabs”.  The other tabs  like  "Desktop", "Screen saver", "appearance" and "Settings are may   missing.  What could be the problem?The most likely cause of this is malware utilizing Group Policy Objects which enforces policies for system settings and/or user account(s) settings.

First you have to ensure  there is no malware in your PC.Now  you have to manually do the registry value change   or by running registry fix from Kellys-Korner.Before making any changes to the Windows XP Registry, please backup your Windows XP Registry
Start> Run> type  “Regedit“ without quotes and navigate these two locations:
HKEY_CURRENT_USER\Software\Microsoft\Windows\CurrentVersion\Policies\System
HKEY_LOCAL_MACHINE\Software\Microsoft\Windows\CurrentVersion\Policies\System
In the right-pane, delete the following values if found:
- NoDispAppearancePage
- NoThemesTab
- NoDispBackgroundPage
- NoDispScrSavPage
- NoDispSettingsPage


If none of the above Policies are set (in both of the locations above), ,Still  the display properties tabs are still missing except for the Themes tab, try  these commands from Start, Run dialog:
regsvr32 themeui
regsvr32 /i shell32
Restart Windows
Visit Kellys-Korner and apply the  Registry Patch(line 285)
http://www.kellys-korner-xp.com/regs_edits/restorealldisplaytabs.reg
Also check : http://support.microsoft.com/kb/922370/en-us
You may also want to perform an XP System Restore by going to Start > All Programs > Accessories > System Tools > System Restore. There you can select a date prior to when the issue began. This can also be done in Safe Mode .
Tagged under: ,

Drag and Drop to Command Prompt, Back in Windows 7


Working with the Command Prompt is one of an IT Professional’s required skills. In previous Windows operating systems, one could drag and object to an open Command Prompt window in order to ease our work. This feature was nice to have especially when running executable files nested deep within a folder hierarchy. Instead of manually navigating the Command Prompt path to the required folder, you could simply drag and drop the necessary file to the Run option or to the Command Prompt and press Enter to run it.
Somehow, this useful feature wend away in Windows Vista and Windows Server 2008. I wrote about this in my Missing Drag and Drop in Vista Command Prompt article. In Vista/2008, if you try to drag a file from anywhere in Windows Explorer to an open Command Prompt window you see that the pointer icon changes to a “no entry” symbol:

When asked, Microsoft officials provided dull answers and claimed that this is “by design” and that it was in fact “a feature”. Some claimed that “This was done to reduce the command window's dealings with the dragged data object”. This last excuse is, in my opinion, pure crap especially when compared to the huge overhead provided by other so-called “advanced” features of Vista such as the process-intensive Aero theme (read my Aero Theme is bad, disable it article or to the huge overhead of the TCP Window Auto tuning functionality that wrecks havoc to your network copy and browse functions (read my Browsing websites and downloading files is painfully slow with Windows Vista. Other answers included things like “you can shift-right-click to get the copy as path function instead” (read my Quickly Copy File and Folder Path in Windows Vista. Another claim was that the drag and drop feature was dropped because it poses a “security risk”. Maybe, I don’t know, but since it’s been present since the days of older operating systems I don’t see why it wasn’t removed before if it was such a huge security risk.
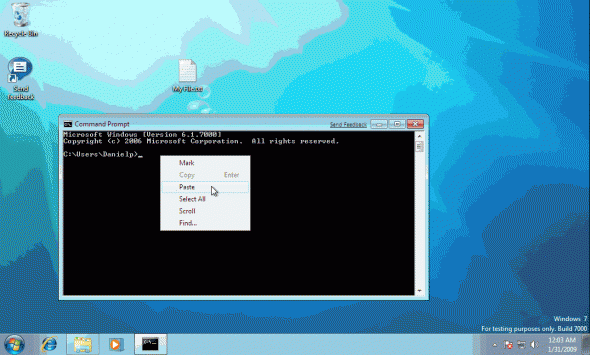
You can imagine that I did not have high expectations set when I booted up my Windows 7 (currently beta build 7000) virtual machine and fired a CMD window. I tried dragging a file name onto the open CMD window, and behold, it works!


Other methods worth mentioning are also listed in my How can I quickly copy a file or a folder's path in Windows Vista? article which describes a trick that still works in Windows 7;
Open a Windows Explorer windows, browse to the required file. Hold the SHIFT key while you right-click the folder.

You can now paste the copied path anywhere you want, including to a Command Prompt window.
Tagged under: , , , ,

Keep any window Always on Top or Transparent


There can be several different reasons why you may want to keep a window always on top of all other open windows. For example, having a video always show while working in another program, keeping a chat always visible, or keeping your most important web page on top at all times. Although some programs may have an always on top feature other programs such as Internet browsers do not support this feature. However, downloading the free PowerMenu utility will allow you to have any window always on top as well as specify the transparency of open windows.
After PowerMenu has been downloaded and installed, right-click on the open window in the Taskbar or on the Windows Title bar to view a menu with options shown above. As can be seen in the above picture, the PowerMenu utility will add the Always On Top and Transparency options for each open window's menu.
Download

Saturday, 3 March 2012

Tagged under: , ,

3 Ways to Enable the Built-In Windows 7 Administrator Account


In Windows 7, like Windows Vista, when you install the operating system, you are asked to enter a user name which will be the primary local user that will use this system.
Like in Windows Vista, in Windows 7 the built-in Administrator's account is disabled by default. Furthermore, this account is not associated with any password.
The new user which is created during the installation is configured to be a member of the built-in Administrators group, and in fact, can be used for any management task. That use is in fact equivalent by all means with the original built-in Administrator account.
However, there may be situations where one would like to use the built-in Administrator account instead of that "new" user. One of these might be when you're building a system for cloning purposes, and would like all cloned machines to be able to use the built-in Administrator's account.
Note that since that account does NOT have a password, enabling it without properly setting a password for that account will open a serious security opening on your system!
There are basically 2 easy methods of enabling the built-in Administrator's account and 1 advanced method.

Method #1 - Using the Local Users and Groups Snap-in

To enable the built-in Administrator's account by using the Local Users and Groups snap-in please follow these steps:
Open Local Users and Groups. You can do so by typing lusrmgr.msc in the Start search box or in the Run command and pressing ENTER. Or, you could open Computer Management by right-clicking Computer in the Start menu and selecting Manage.

Expand System Tools > Local  Users and Groups > Users.
Right-click the Administrator account and select "Set Password".

In the"Set Password for Administrator" click "Proceed".

In the"Set Password for Administrator" enter the Administrator's desired password twice, and click "Ok".


Next, enable the Administrator's account. Right-click the Administrator's account and select "Properties".

Un-chek the "Account is disabled" check-box. Click on the "Ok" button.

Administrator's account is now enabled and configured with a password.

Method #2 - From the Command Prompt

To enable the built-in Administrator's account by using the Command Prompt  please follow these steps:
1. Click Start and type CMD, then press Enter. It is best to run the Command Prompt as an Administrator. To do so, right-click CMD and select "Run as Administrator".

When prompted to allow the Command Processor to run, click on "Yes".

BTW, you can also hover over the CMD line and press CTRL + SHIFT + ENTER to invoke the "Run as Administrator" shortcut.
In the Command Prompt window, type:
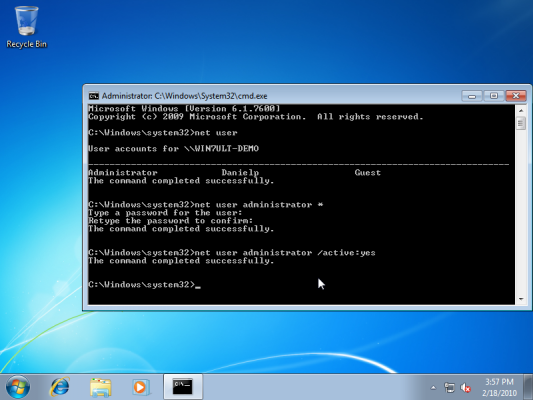
net user
Note how the Administrator account is there, yet the new user account has not been yet created.
To set the Administrator's account password:
net user *
Then enter the required password and confirm it.
To enable the Administrator's account:
net user administrator /active:yes
Method #3 (Advanced Users) - During the Installation Process

There is a 3rd method which advanced users can use. This method can be used during the installation process itself.
During the installation, after being prompted to configure the new user account, you will be able to set the new account's password.
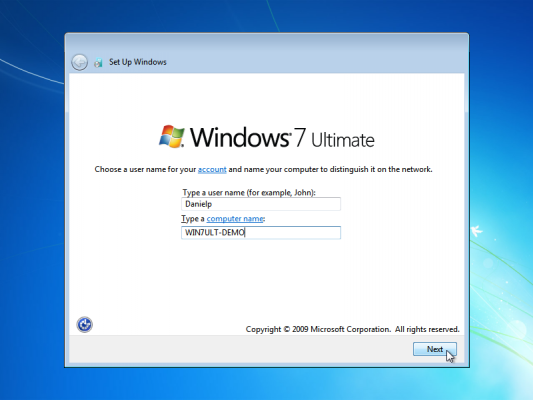

At that phase, press SHIFT and F10 keys together. A Command Prompt window will appear.

In the Command Prompt window, type:
net user
Note how the Administrator account is there, yet the new user account has not been yet created.
To set the Administrator's account password:
net user *
Then enter the required password and confirm it.
To enable the Administrator's accoun:
net user administrator /active:yes

Close the Command Prompt window and continue with the installation process.
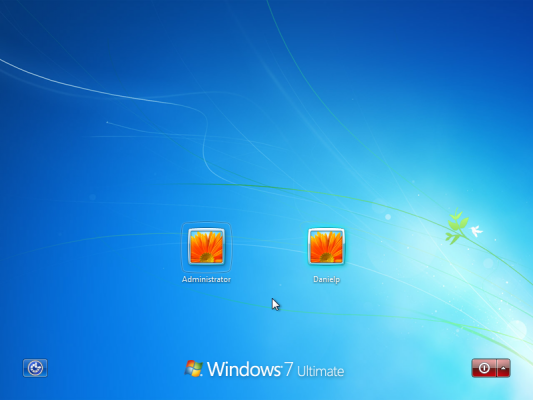
If you log off you will now see the Administrator's account as a valid logon option.