
This tutorial shows the step
by step process to turn a normal photo into a spectacular image, just by
using creativity and some technical knowledge.
You'll learn how to transform a photo of a jewelry box into a fantasy image of an armored dragon. Some basic photoshop knowledge is required to follow this tutorial.
I've used photoshop CS5 to create this image.
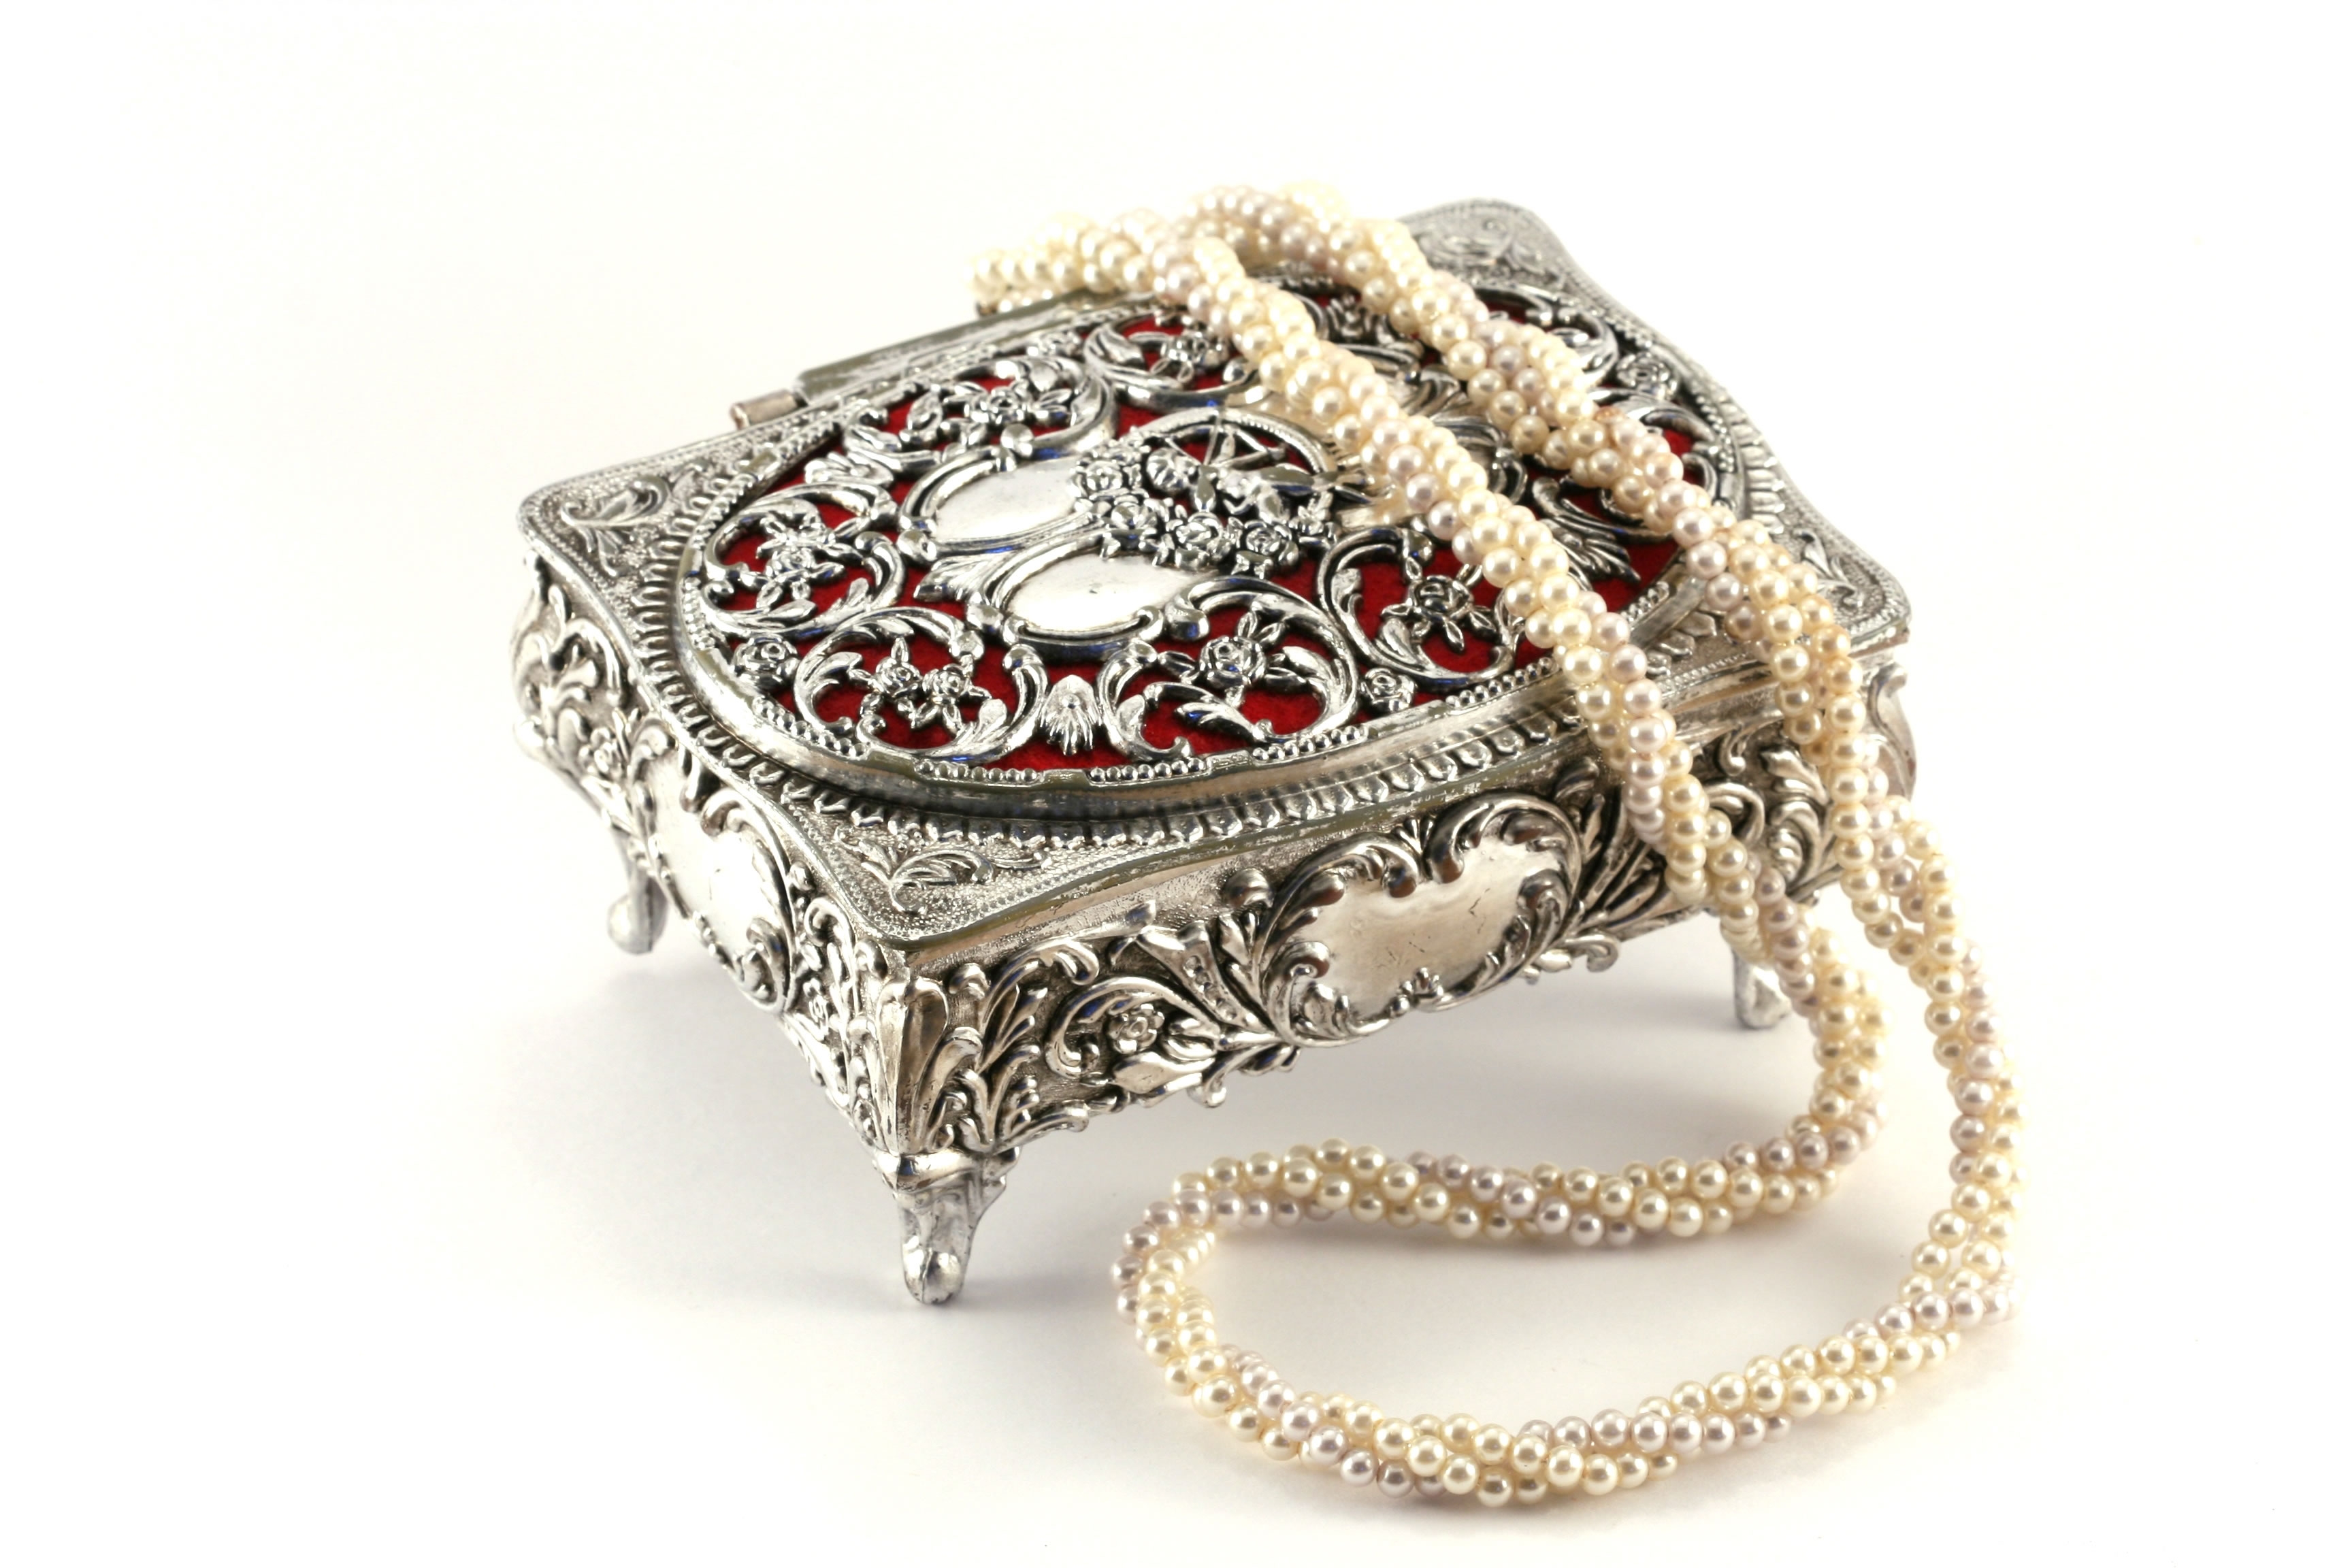
The only source used was the image "Jewelry Box" provided by pxleyes.
Author:


You'll learn how to transform a photo of a jewelry box into a fantasy image of an armored dragon. Some basic photoshop knowledge is required to follow this tutorial.
I've used photoshop CS5 to create this image.
The only source used was the image "Jewelry Box" provided by pxleyes.
End result:

Author:
Views: 18511
Score: 8.43 / 10
Author earned: $30
 Tags:
Tags:
Step 1
1. Create a New Document= 1200 * 1200 Px2. In the image you can see the parts we will use to make our creation.
You can download the high resolution version of this image HERE.

Step 2
1. Cut out 1 pearl from the source image, this pearl will be the base to make the complete dragon texture.2. Duplicate the pearl layer 5 times and merge them.
3. You will have a line of pearls now. Duplicate it 3 times and merge them.
4. Take the new layer and duplicate it again and merge to obtain the base that you can see in the image number 4.
SAVE A COPY OF THIS LAYER FOR FUTURE USE (Call it Pearl base).
5. Apply WARP to the figure to make it semi curve.
6. Duplicate the new layer and merge again. Now you have the dragon's base.

Step 3
Take the base and save a copy for future uses.1. Now, it's time to make the dragon body. Take the base and duplicate it, rotate the new layer to begin with the dragon's neck.
2. Duplicate again the base and follow a curve shape.
3. Repeat the steps 1 and 2 until you finish with the neck.
4. Again take the base and make the dragon's body. Use WARP each time is needed to adjust the forms.
5. To make the tail you can use the neck and body layers, duplicate and merge. Take the new layer and use it like base to make the tail.
6. Merge all the layers you have until now, and with WARP adjust the form.

Step 4
1. With your favorite selection tool make a cut in the dragon's body. When you have the selection done press CTRL+C to copy and CTRL+V to paste it in a new layer.2. With WARP give a basic head form to the new layer.
3. Duplicate the layer and scale it (small) to complete the dragon's head.
4, 5 and 6. Cut out a neck part in a new layer. duplicate it 3 times and now you have the arms and legs, put them in the correct place and position.

Step 5
1. Take the layer "pearl base" that was made in the step 2 in this tutorial, duplicate it.2. Use the new pearl base layer to make the wings, apply WARP to enlarge it and duplicate it.
3. Apply WARP to give the big wings base like you can see in the figure number 3.
4, 5 and 6. With this large figure you must fill all the wing. Duplicate it the times you need to complete the wing. (see images 4, 5 and 6)

Step 6
1. Cut out the dragon tail and adjust its form with WARP.2. Cut out a pearl from the source image to make the eye.
3. Cut out a little piece of the jewelry box (See step 1 to guide). This piece will be the armor base.
4. Duplicate the layer 8 times and place the layers following the neck figure.
5. Cut out anothe jewelry box piece (See step 1 to guide). This piece will be the base to make the dragon's claws.
6 and 7. Make all the claws and place them.
8. Cut out a flower from the jewelry box (See step 1 to guide). And use it to cover the hands and feet to the dragon.

Step 7
1. Take the armor base, apply WARP to make the figure you can see in this step image.Use this new piece to make the helmet. You must duplicate it 5 times in total fot this step.
2. Select the wing, duplicate it to make the second wing.
3. To make the fangs; take a claw, change its size (do it smaller) and duplicate it sometimes (20 times). place the fangs below the head layer.

Step 8
1. Again with WARP transform the armor base into a large figure. This new figure will be the base to the wing's armor and the body armor.2. Take again the "Pearl base" you did in the step 2 in this tutorial. With WARP give the form that you see in the image. And apply a color change.
Image - Adjust - Color Balance
with the values:
Lighting= Cyan +14 / Magenta +6 / Yellow -25
Duplicate this layer, invert and merge the 2 layers. Put this image below the dragon to make a kind of floor.
3. Select the dragon's body and the wing main lines and apply:
Image - Adjust - Color Balance
with the values:
Mid Tones= Cyan 0 / Magenta +40 / Yellow 0
This will give green color to the dragon.
4. Select the wing texture and apply:
Image - Adjust - Color Balance
with the values:
Mid Tones= Cyan -10 / Magenta +35 / Yellow 0
Shadows = Cyan -10 / Magenta 0 / Yellow +40
This will give another kind of green to the wings.

Step 9
1. Cut out a part of the jewelry box image to use it like background (See step 1 to guide).Make the image big to cover all the canvas, and apply GAUSSIAN BLUR with a value of 5,0 to give depth.
2. With the BURN Tool, apply shadows in the dragon's body.

Step 10
1. With the BURN Tool add shadows to the wing.2. With the DODGE Tool add lightings to all the image, dragon body, wings, armor and floor.

Step 11
1. With the BURN Tool add shadows to the armor.2. Duplicate the dragon body layer. Take the new layer and go to
Image - Adjust - Hue/Saturation
Low its luminosity to 0
Apply GAUSSIAN BLUR + 3
Low its opacity to 70%
This layer will be the dragon shadow in the floor.

Step 12
1. Add more strong shadows to the dragon body to make the image more strong.2. Merge all the layers in the document. go to:
Image - Adjust - Brightness/Constrast
and raise the contrast +20
The image is finished.
I hope you like the tutorial, good luck!!!!!!!


0 comments:
Post a Comment