To add the Arabic language support in English version of Windows you need to follow these instructions:
- Click on "Start" button and then select "Control Panel".
- Under "Clock, Language, and Region" area select "Change keyboards or other input methods" link. Note: If you are in the Control Panel "Classic View" then
 double-click on "Regional and Language Options" icon and click on the tab "keyboard and languages".
- Click on the "Change keyboards…" button then click on "Add…" button.
- Expand "Arabic (your Country)" tree then Expand "Keyboard" tree from the list.
- Make a check mark beside the required keyboard(s).
Note: You can preview any keyboard before adding it by highlighting its name then click on "Preview…" button.
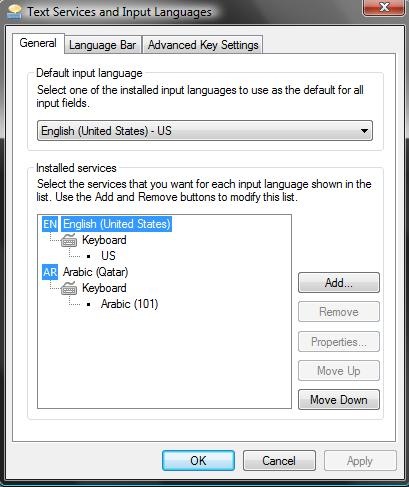
- Click "OK" to add the selected keyboards to the "Installed Services".
- Click "OK" to confirm and apply your new language settings.
Note:
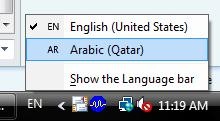
If you add more than one keyboard to the same language; you will notice
a keyboard icon in the language bar which enables you to switch between
the language keyboards.

0 comments:
Post a Comment