Today I’m going to teach you how to create some truly awesome
lighting effects. Back when I was a Photoshop beginner I used to look at
lighting effects like this and wonder how they could achieved. Quite
simply they seemed out of my depth.
However, I’ll walk you through just how easy it is, with a bit of time and creativity. The techniques themselves aren’t overly complex. It’s essentially a combination of gradients, textures, masking, brushes, and adjustment layers. However, you’ll see in this tutorial how it’s the building up of these aspects which leads to great results. It’s not good slapping on a few lighting brushes and expecting your piece to really pop. You need to build up lots and lots of layers of effects, and make sure they these compliment each other, and are never overdone. Enjoy the tutorial!

Fill your background with a deep, dark purple. You want to try to avoid 100% blacks as they tend to make your images feel flat. I went with: 0d0a11.
Go to filter>render>clouds. Then reduce this layer’s opacity to 40%. Finally go to layer>layer mask>reveal all and drag out a white to black radial gradient from the center of your canvas. This will mask off the edges of your cloud area.


Change this layer’s blend mode to ‘overlay’ and reduce it’s opacity to 30%.


Then change this layer’s blend mode to ‘overlay’.


Render some clouds and reduce this layer’s opacity to 40%, changing it’s blend mode to ‘overlay’. This should add an extra level of texture/depth to your background.

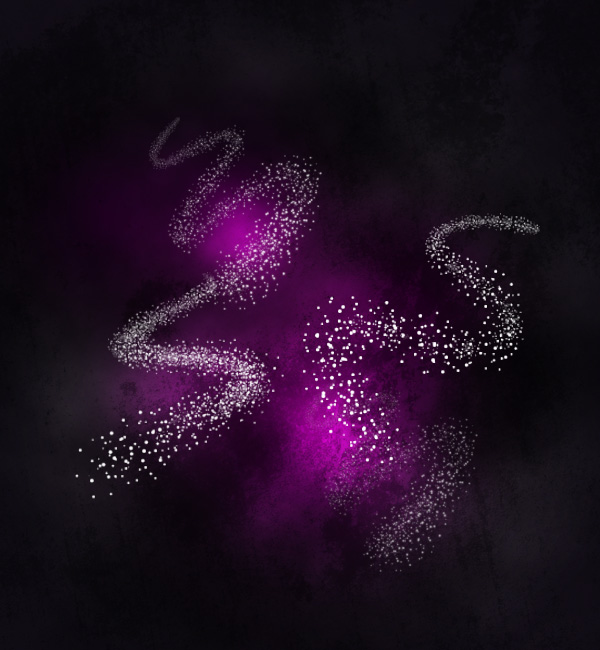
Apply some of the brushes over your background, using a white brush.
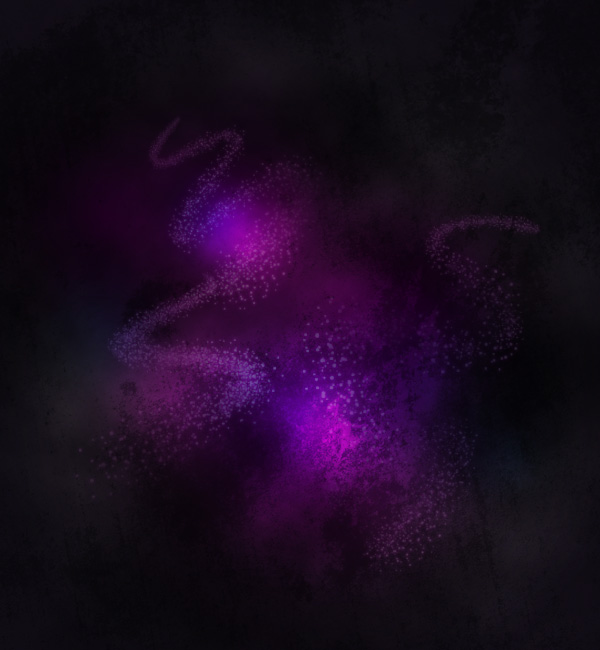
Then go to layer>layer mask>reveal all, and use a soft black paintbrush to brush over parts of your star trailers, fading them smoothly into the background.

Outer Glow Settings:
Blend Mode: Normal
Opacity: 100%
Color: f600ff
Spread: 0%
Size: 4px
Then reduce your star trailers layer’s opacity to 30%.


Apply several radial gradients ranging from light blue to transparent. Then change this layer’s blend mode to ‘overlay’.

Change this layer’s blend mode back to ‘normal’ and then reduce it’s opacity to 15%.

Then change this layer’s blend mode to ‘overlay’ and reduce it’s opacity to 50%.


Leave this layer’s opacity at 100%, but change it’s blend mode to ‘overlay’.


Then paste it into the center of your document, resizing/rotating it as necessary.

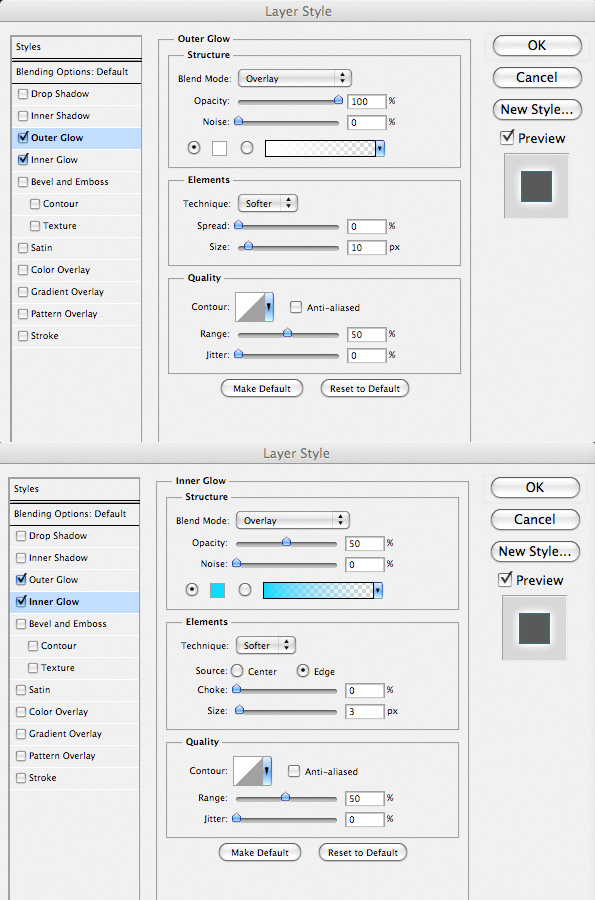
Out Glow Settings:
Blend Mode: Overlay
Opacity: 100%
Color: White
Spread: 0%
Size: 10px
Inner Glow Settings:
Blend Mode: Overlay
Opacity: 50%
Color: 00d8ff
Choke: 0%
Size: 3px
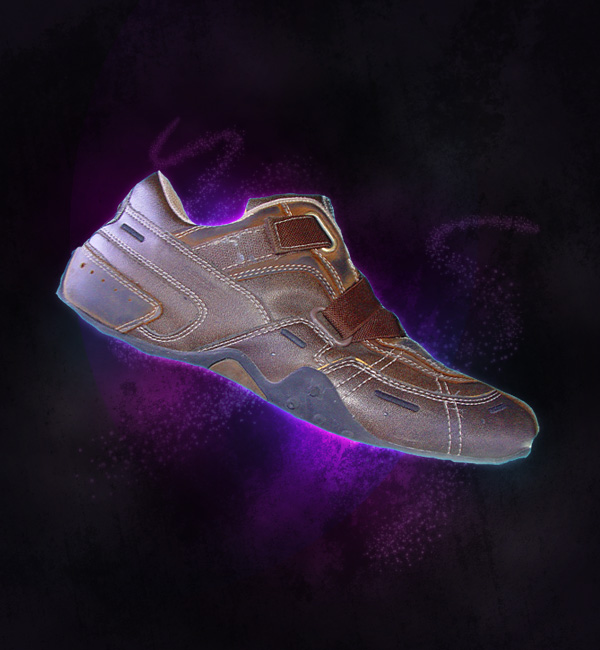
Make sure to apply a clipping mask to each adjustment layer, so that they only effect your sneaker image, not the entire canvas:
Hue/Saturation Adjustment Layer Settings:
Hue: 0
Saturation: -95
Lightness: 0
Color Balance Adjustment Layer Settings:
Shadows: -8, -4, -4
Midtones: -15, -12, +1
Highlights: -2, -5, -6
Levels Adjustmenet Layer Settings:
57 / 0.87 / 204


Then duplicate this texture several times, and go to edit>transform>distort. Distort each texture to form an abstract pane jutting out from behind your sneaker.
Then apply layer masks to each pane, fading them smoothly into your background. Finally, reduce each texture layer’s opacity to 50%.


Use your elliptical marquee tool and linear gradient tool to create an elliptical fade effect (ranging from pink to transparent). Then change this layer’s opacity to 40%.
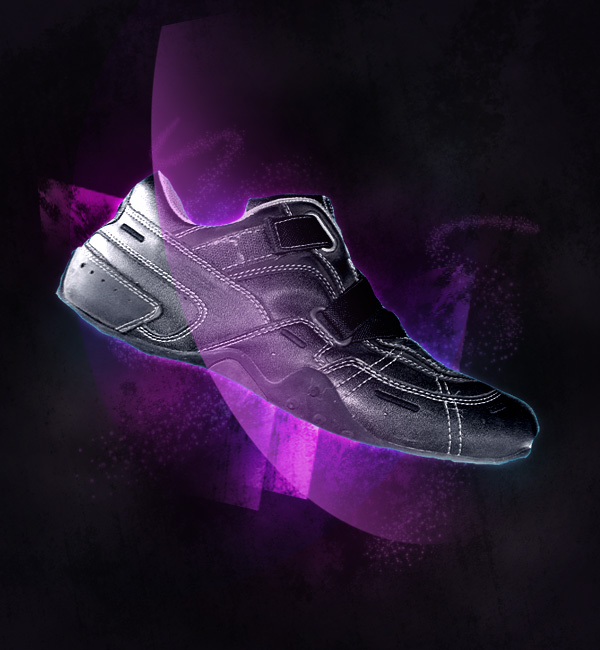

Reduce this layer’s opacity to 20%.

Then apply a pink outer glow effect:
Outer Glow Settings:
Blend Mode: Normal
Opacity: 100%
Color: ae00ff
Spread: 0%
Size: 8px


Repeat the previous technique, of applying a colored outer glow effect to your brush marks, and then masking off these layers, to make the effect far more subtle. The images below show these layers without and then with the layer masks applied. You can see how the masking process makes the lighting effect far fainter:


Apply your ‘twisted bars’ brush set using a white brush. Then reduce this layer’s opacity to 40% and mask off areas of your bars to make the effect more subtle:
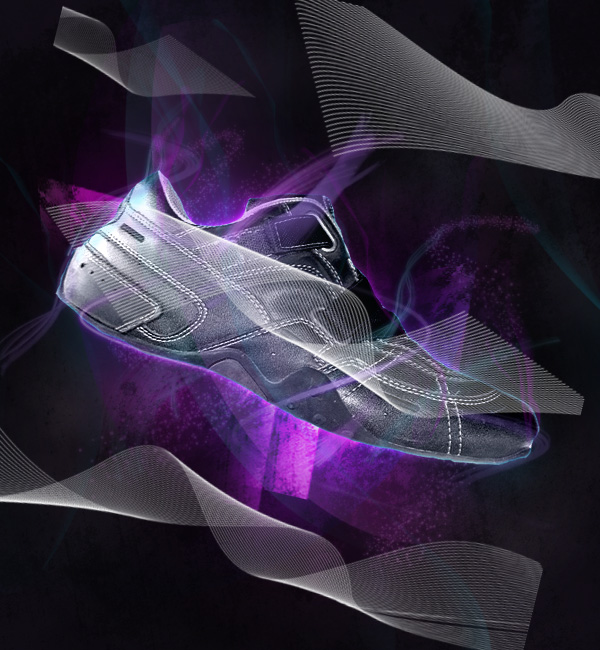


This time keep this layer’s blend mode at ‘normal’, but reduce it’s opacity to 20%.
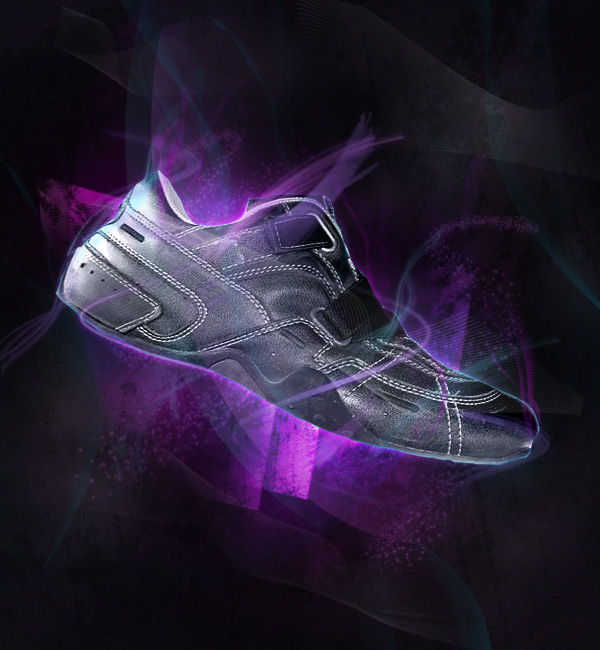
Use a small, soft white paintbrush to paint over the seams of your sneakers.
Then apply a blue ‘outer glow’ blending option:
Outer Glow Settings:
Blend Mode: Screen
Opacity: 100%
Color: 00e4ff
Spread: 0%
Size: 5px


This should give a subtle, but awesome lighting effect over the seams of your sneaker.

Apply several of the brushes over your sneaker. Then use a layer mask to mask off parts of these fractal lines, making the effect less obvious.


Go to edit>fill and fill this layer with 50% gray. Then change this layer’s blend mode to ‘overlay’.
This will allow you to paint over black for your shadows, and white for your highlights, letting you dodge/burn your image in a non-destructive way.
Finally, reduce this layer’s opacity to 60%.
The images below show the dodge/burn layer at ‘normal’ blend mode (100% opacity) and then at ‘overlay’ blend mode (60% opacity):


Gradient Overlay Adjustment Layer Settings:
Gradient Ranging From: e10019 to 00601b.
Layer Opacity: 8%
Layer Blend Mode: Overlay
Second Gradient Overlay Adjustment Layer Settings:
Gradient Ranging From: 0b01b8 to fdfa03 to 0b01b8.
Layer Opacity: 8%
Layer Blend Mode: Overlay
Curves Adjustment Layer Settings:
(see diagram below)
Levels Adjustment Layer Settings:
3 / 1.00 / 241


Now undo your ‘flatten image’ step, bringing back all your layers, but paste your copied image onto a new top layer. This means that you now have your final image on a single layer.
Then go to filter>sharpen>unsharp mask. Apply the settings below, and it should bring out the detail of your piece nicely.
UnSharp Mask Settings:
Amount: 80%
Radius: 1.0px
Threshold: 0 levels


However, I’ll walk you through just how easy it is, with a bit of time and creativity. The techniques themselves aren’t overly complex. It’s essentially a combination of gradients, textures, masking, brushes, and adjustment layers. However, you’ll see in this tutorial how it’s the building up of these aspects which leads to great results. It’s not good slapping on a few lighting brushes and expecting your piece to really pop. You need to build up lots and lots of layers of effects, and make sure they these compliment each other, and are never overdone. Enjoy the tutorial!
Resources Used In This Tutorial
Final Image
Here is a preview of the image that we are going to be creating:
Step 1
Create a new document (600X650px).Fill your background with a deep, dark purple. You want to try to avoid 100% blacks as they tend to make your images feel flat. I went with: 0d0a11.

Step 2
Now create a new layer called ‘clouds’.Go to filter>render>clouds. Then reduce this layer’s opacity to 40%. Finally go to layer>layer mask>reveal all and drag out a white to black radial gradient from the center of your canvas. This will mask off the edges of your cloud area.


Step 3
Now paste in the first texture from yesterday’s Texture Thursday: Silver pack. You can find this in the resources section for this tutorial.Change this layer’s blend mode to ‘overlay’ and reduce it’s opacity to 30%.


Step 4
Now we want to start building up the tones of our background. Create a new layer called ‘highlight purple’. Then drag out a series of purple to transparent radial gradients (ranging from 8f0186 to transparent).Then change this layer’s blend mode to ‘overlay’.


Step 5
Now create a new layer called ‘highlight pink’. Repeat the technique used in Step 4, this time ranging your radial gradients from ff81f7 to transparent.

Step 6
Now create a new layer called ‘clouds 2′.Render some clouds and reduce this layer’s opacity to 40%, changing it’s blend mode to ‘overlay’. This should add an extra level of texture/depth to your background.

Step 7
Create a new layer called ‘star trailers’. Now download the ‘star trails’ brush set from the resources section.Apply some of the brushes over your background, using a white brush.
Then go to layer>layer mask>reveal all, and use a soft black paintbrush to brush over parts of your star trailers, fading them smoothly into the background.


Step 8
Now apply an outer glow blending option to your star trailers layer.Outer Glow Settings:
Blend Mode: Normal
Opacity: 100%
Color: f600ff
Spread: 0%
Size: 4px
Then reduce your star trailers layer’s opacity to 30%.


Step 9
Now create a new layer called ‘blue highlights’.Apply several radial gradients ranging from light blue to transparent. Then change this layer’s blend mode to ‘overlay’.


Step 10
Now duplicate your ‘blue highlights’ layer, calling this duplicate layer ‘blue highlights 2′.Change this layer’s blend mode back to ‘normal’ and then reduce it’s opacity to 15%.

Step 11
Now create a new layer called ‘big circle gradient’. Use your elliptical marquee tool and linear gradient tool to create a fading ellipse effect. Range your linear gradient fill from 457fa1 to transparent:Then change this layer’s blend mode to ‘overlay’ and reduce it’s opacity to 50%.


Step 12
Repeat the previous step, this time creating a pink to transparent gradient (7c3285 to transparent).Leave this layer’s opacity at 100%, but change it’s blend mode to ‘overlay’.


Step 13
Grab the sneaker photo from the resources section and cut it out using your preferred method.Then paste it into the center of your document, resizing/rotating it as necessary.

Step 14
Now apply an outer glow and inner glow blending option to your sneaker layer:Out Glow Settings:
Blend Mode: Overlay
Opacity: 100%
Color: White
Spread: 0%
Size: 10px
Inner Glow Settings:
Blend Mode: Overlay
Opacity: 50%
Color: 00d8ff
Choke: 0%
Size: 3px


Step 15
Now apply some adjustment layers to make your sneaker blend in better with the composition.Make sure to apply a clipping mask to each adjustment layer, so that they only effect your sneaker image, not the entire canvas:
Hue/Saturation Adjustment Layer Settings:
Hue: 0
Saturation: -95
Lightness: 0
Color Balance Adjustment Layer Settings:
Shadows: -8, -4, -4
Midtones: -15, -12, +1
Highlights: -2, -5, -6
Levels Adjustmenet Layer Settings:
57 / 0.87 / 204


Step 16
Now paste in a smaller sized version of your ‘silver’ texture, pasting it above your large silver texture layer, but beneath all of your coloring and highlight layers.Then duplicate this texture several times, and go to edit>transform>distort. Distort each texture to form an abstract pane jutting out from behind your sneaker.
Then apply layer masks to each pane, fading them smoothly into your background. Finally, reduce each texture layer’s opacity to 50%.


Step 17
Now create a new layer called ‘circle gradient overlay’.Use your elliptical marquee tool and linear gradient tool to create an elliptical fade effect (ranging from pink to transparent). Then change this layer’s opacity to 40%.


Step 18
Now repeat this technique, but creating an elliptical fade ranging from blue to transparent.Reduce this layer’s opacity to 20%.

Step 19
Create a new layer called ‘light lines pink’. Use your light lines brush to paint over some cool effects.Then apply a pink outer glow effect:
Outer Glow Settings:
Blend Mode: Normal
Opacity: 100%
Color: ae00ff
Spread: 0%
Size: 8px


Step 20
Now go to layer>layer mask>reveal all, and use a soft, black paintbrush to mask off areas of your light lines, making the effect far more subtle:
Step 21
Now create two more layers, one called ‘light lines blue’ and the other ‘light lines purple’.Repeat the previous technique, of applying a colored outer glow effect to your brush marks, and then masking off these layers, to make the effect far more subtle. The images below show these layers without and then with the layer masks applied. You can see how the masking process makes the lighting effect far fainter:


Step 22
Repeat this exact same technique, but use your ‘fine wisps’ brush set. Just try to build up layers of brush effects gradually, always being sure to mask them off correctly so that the effect isn’t too intense.
Step 23
Now create a new layer called ‘twisted bars’.Apply your ‘twisted bars’ brush set using a white brush. Then reduce this layer’s opacity to 40% and mask off areas of your bars to make the effect more subtle:


Step 24
Now a new layer called ‘white highlights’. Create a series of white to transparent radial gradients over your canvas, and then change this layer’s blend mode to ‘overlay’.

Step 25
Now create a new layer called ‘white highlights 2′. Create a series of smaller white radial gradient highlights over your canvas.This time keep this layer’s blend mode at ‘normal’, but reduce it’s opacity to 20%.

Step 26
Now create a new layer called ‘trace lines’.Use a small, soft white paintbrush to paint over the seams of your sneakers.
Then apply a blue ‘outer glow’ blending option:
Outer Glow Settings:
Blend Mode: Screen
Opacity: 100%
Color: 00e4ff
Spread: 0%
Size: 5px


Step 27
Now reduce this layer’s ‘fill opacity’ to 50%, and the main layer opacity to 30%. Change the layer’s blend mode to ‘overlay’.This should give a subtle, but awesome lighting effect over the seams of your sneaker.

Step 28
Now download the fractal brush set from the resources section.Apply several of the brushes over your sneaker. Then use a layer mask to mask off parts of these fractal lines, making the effect less obvious.


Step 29
Now create a new layer called ‘dodge/burn’.Go to edit>fill and fill this layer with 50% gray. Then change this layer’s blend mode to ‘overlay’.
This will allow you to paint over black for your shadows, and white for your highlights, letting you dodge/burn your image in a non-destructive way.
Finally, reduce this layer’s opacity to 60%.
The images below show the dodge/burn layer at ‘normal’ blend mode (100% opacity) and then at ‘overlay’ blend mode (60% opacity):


Step 30
Now apply a series of final adjustment layers just to give your image a more polished feel.Gradient Overlay Adjustment Layer Settings:
Gradient Ranging From: e10019 to 00601b.
Layer Opacity: 8%
Layer Blend Mode: Overlay
Second Gradient Overlay Adjustment Layer Settings:
Gradient Ranging From: 0b01b8 to fdfa03 to 0b01b8.
Layer Opacity: 8%
Layer Blend Mode: Overlay
Curves Adjustment Layer Settings:
(see diagram below)
Levels Adjustment Layer Settings:
3 / 1.00 / 241


Step 31
Now go to layer>flatten image. Select your entire canvas and hit ‘copy’.Now undo your ‘flatten image’ step, bringing back all your layers, but paste your copied image onto a new top layer. This means that you now have your final image on a single layer.
Then go to filter>sharpen>unsharp mask. Apply the settings below, and it should bring out the detail of your piece nicely.
UnSharp Mask Settings:
Amount: 80%
Radius: 1.0px
Threshold: 0 levels


And We’re Done!
You can view the final outcome below. I hope that you enjoyed this tutorial and would love to hear your feedback on the techniques and outcome.


0 comments:
Post a Comment