Setting up JContact to work in your Joomla is a several step process. To get the maximum benefit of the iContact
API, you need to enable the JContact component in your iContact account
and enter some settings into the JContact Joomla component.
Before you start, head to iContact and grab a free trial.
You'll also need to download a copy of the JContact component.
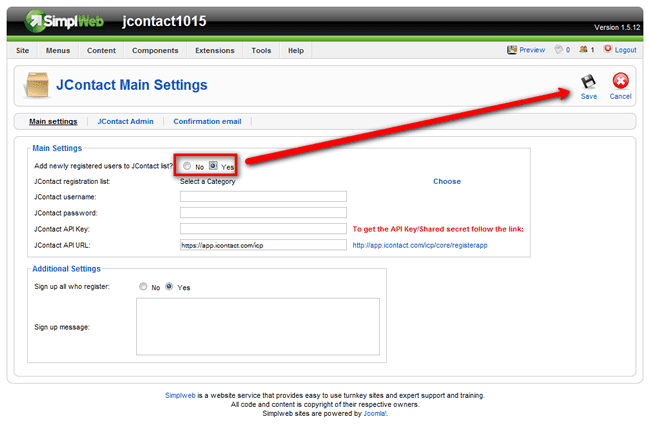
Once installed, you will need to configure the JContact main settings: Components > JContact > Main Settings.
To enable the component, change "Add Newly Registered Users" to yes and click save.
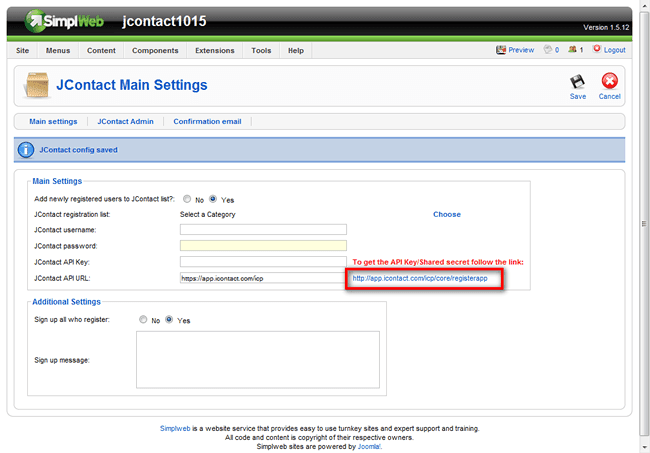
 You will then need to enable the component for the API in your
iContact account. To do this you will see a link, highlighted below.
First log into your iContact account and then click or browser to that
URL.
Note that the API URL can be changed to work with the iContact dev sandbox should you wish. For now, just leave that URL as is.
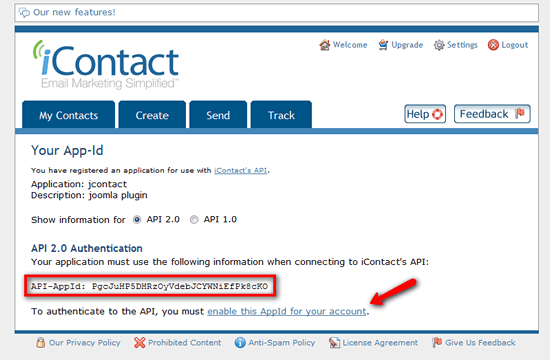
 Once at iContact, you will need to give the application (i.e.
JContact) a name, and make sure you are enabling it for the 2.0 API..
Remember your API username and password, the key and then click on the
link to enable the AppId.
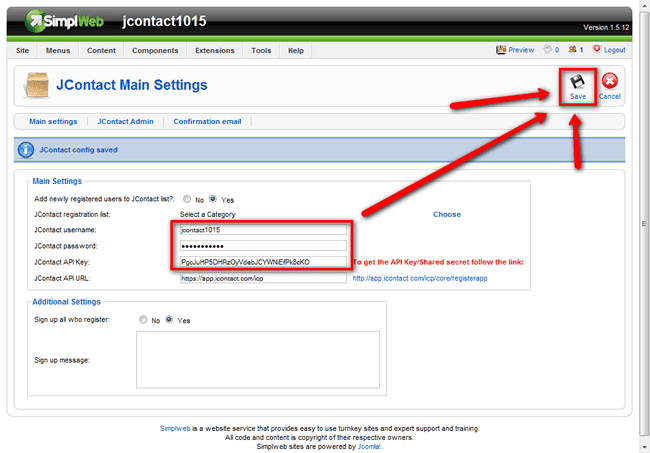
 You can now go back to you settings screen and enter in the values from iContact for the username, password and Key.
Then click save!
 Once you have saved this information, you should be able to click on
choose and a box will pop up with your iContact lists. If you get an
error here, there is some sort of problem communicating with the
iContact API, Check your passwords etc.
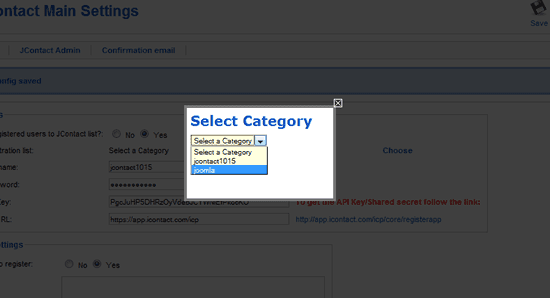 By default, all registered users will get added to your selected
list. You can add a field that gives users the option of whether they
want to sign up or not.
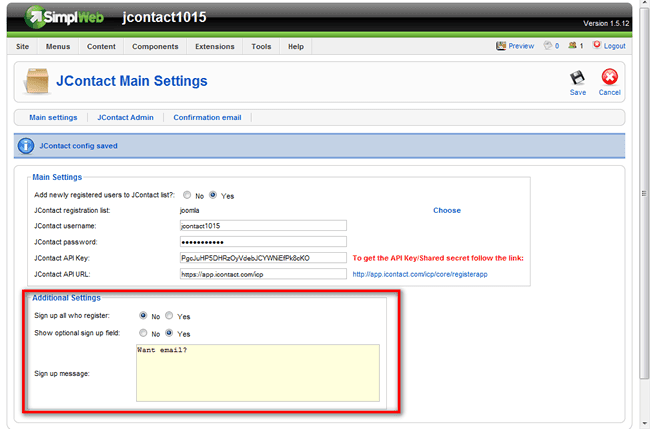 At this point you should also create a registration email that will take the place of the core Joomla one.
The last step is to create a link to the special registration page.
JContact must use its own registration page to rather than the core Joomla one in order to work properly. You can create a menu item to the component as normal.
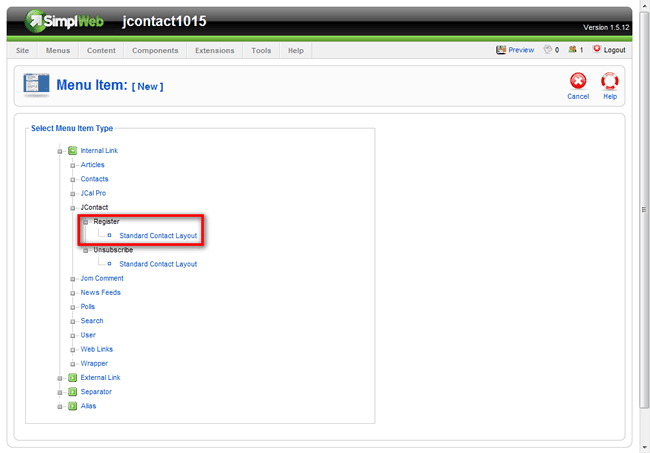 Note, that if someone happens upon your Joomla core registration page
and uses that, they won't interact with iContact. Site visitors can
possibly stumble across this from the login module/form. You might want
to consider a template override to change that link, or an htaccess
redirect.
Before you start, head to iContact and grab a free trial.
You'll also need to download a copy of the JContact component.
Once installed, you will need to configure the JContact main settings: Components > JContact > Main Settings.
To enable the component, change "Add Newly Registered Users" to yes and click save.

Note that the API URL can be changed to work with the iContact dev sandbox should you wish. For now, just leave that URL as is.


Then click save!


The last step is to create a link to the special registration page.
JContact must use its own registration page to rather than the core Joomla one in order to work properly. You can create a menu item to the component as normal.


0 comments:
Post a Comment