Today, I’m going to show you how to create a variety of light effects
in Photoshop CS5 that can be applied to photography or illustration.
Layered PSD file included. Let’s get started!

Start working by creating a new document (Ctrl+N) in Adobe Photoshop with the size 1000px by 1000px (RGB color mode) at a resolution of 72 pixels/inch. Use the Paint Bucket Tool (G) to fill with black color the new background layer.

Find a stock photo with a model represented on it, I used this photo from deviantart. I would like to thank the author of this photo, or if you prefer, you can substitute similar image of your own.
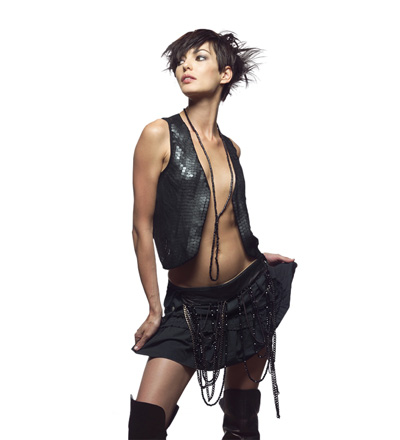
Remove the background using your favorite tools like Pen Tool (P), Magic Wand Tool (W), Magnetic Lasso (L) or even a simple Filter>Extract and insert it on a new layer in our main document.

Create a new layer and select the Soft Round brush from Brush Tool (B).
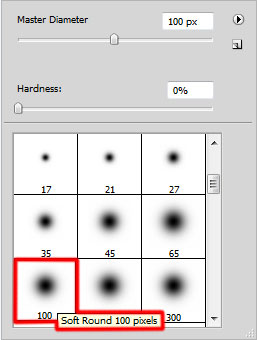
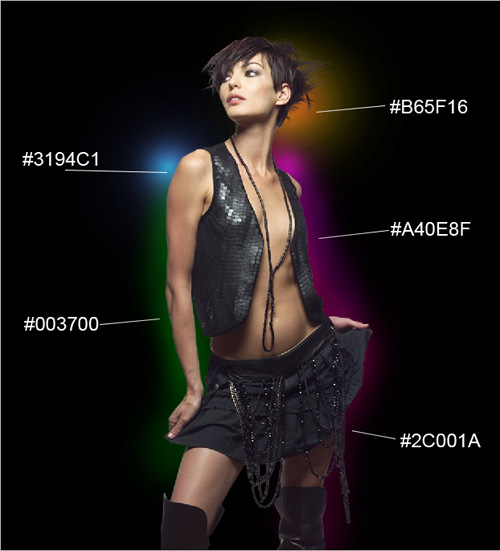
Use this brush to paint the next zones around the girl as shown. Place this layer under the girl’s one.
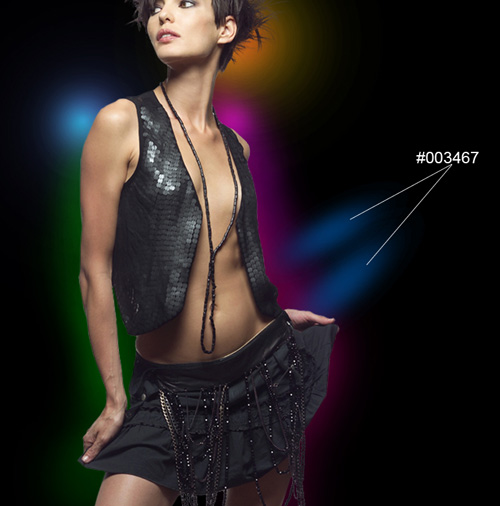
On the next new layer we’ll apply the same brush to draw two lines. The layer should be placed under the girl’s one too.
Create a new layer and select the Soft Round brush from Brush Tool (B) of bigger diameter this time.

Use this brush to represent a kind of highlight.
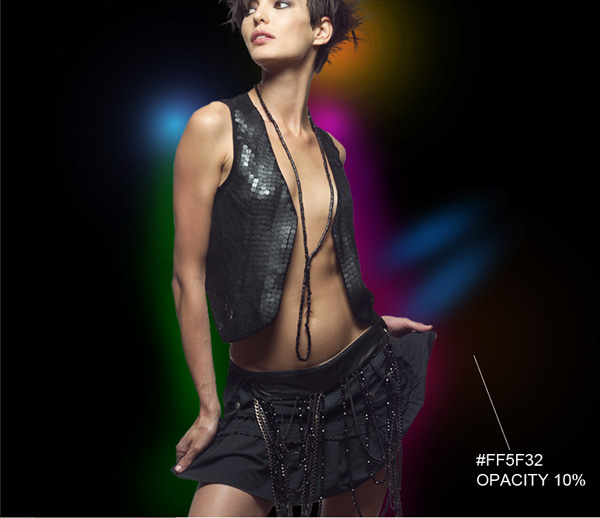
Now we have to create a new layer again and use on it the Soft Round brush of white color to add some white spots around the girl. Select after that the Smudge Tool (R) to smudge the white spots as it is shown below. Place this layer under the girl’s layer.
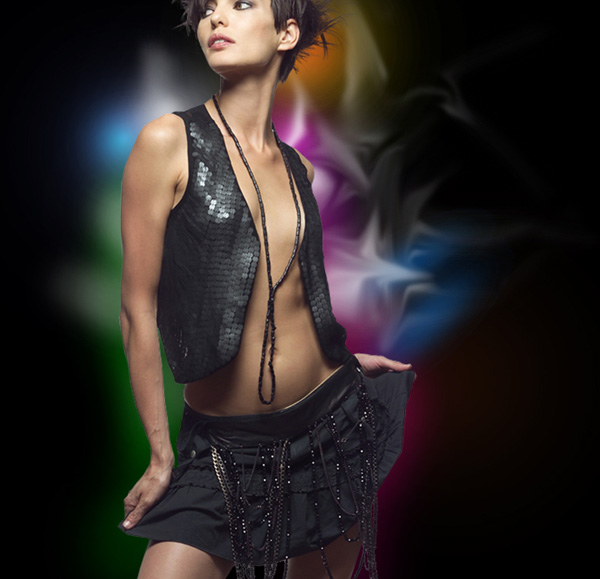
Next we’ll add a pattern on the background, download the Metal Mesh Patterns from deviantart. I would like to thank the author of these patterns:
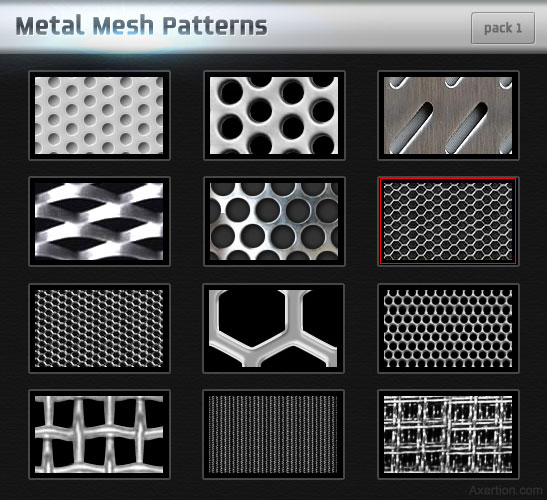
Copy the pattern file to your Program Files\Adobe\Adobe Photoshop X\Presets\Patterns folder (Adobe Photoshop X been your version of Photoshop).
Create a new layer and set Fill to 0% for this layer, click on Add a layer style icon from bottom part of the Layers panel and select Pattern Overlay. Click the Pattern Preset Picker and Load the pattern file from Program Files\Adobe\Adobe Photoshop X\Presets\Patterns folder. Apply the next settings for Pattern Overlay:
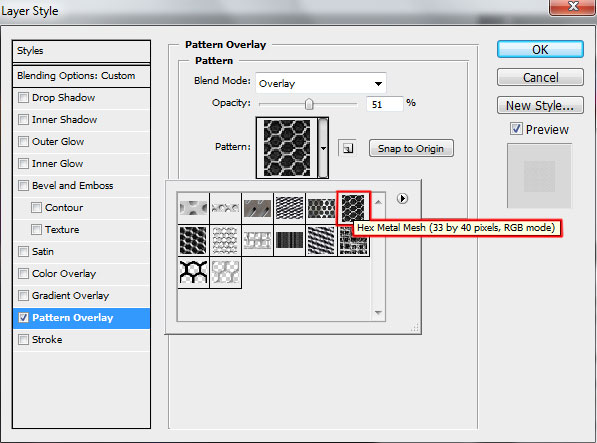
The layer should be situated under the girl’s one.
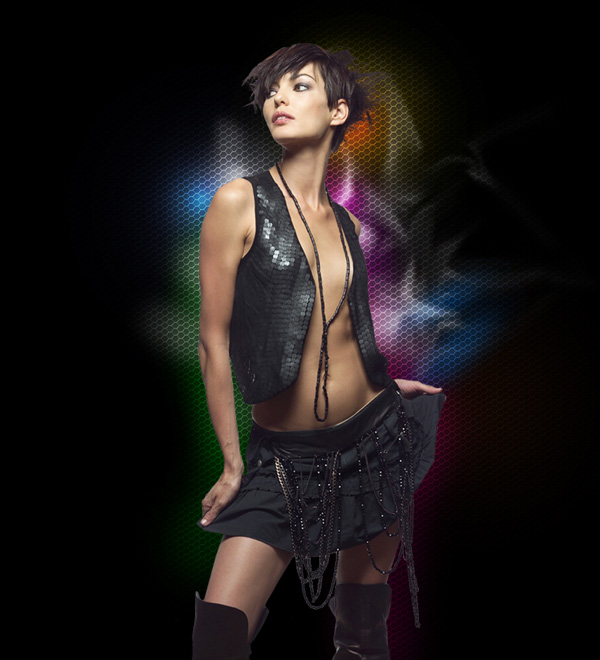
Create a new layer again which must be filled with #FFFFE0 color using Paint Bucket Tool (G). Place this layer under the girl’s layer.
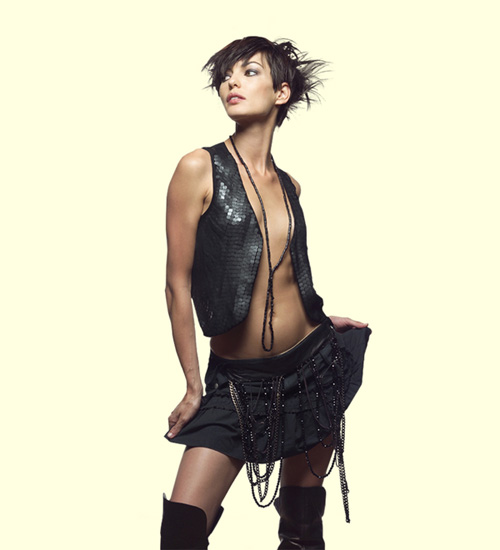
Insert the mask on the layer by choosing Add layer mask on the bottom part of the Layers panel and choose the Hard Mechanical brush of black color.
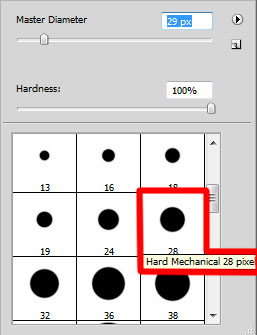
Use this brush to paint in the mask to hide the next zones on the layer.
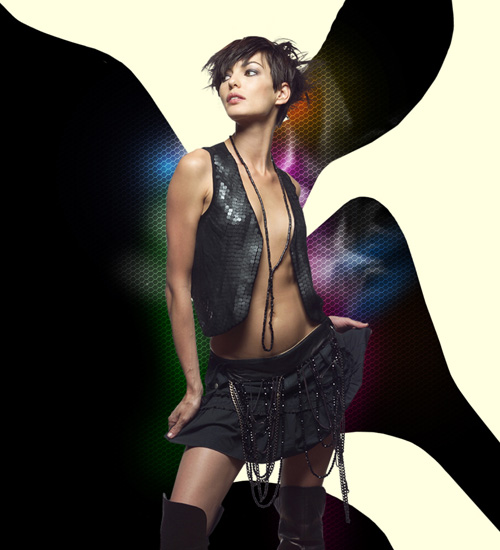
Set Fill to 12% for this layer.
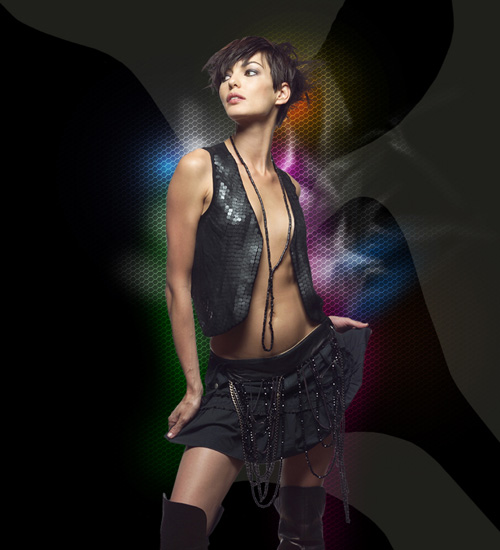
Put together this layer with the new one (Create new layer) into a singe layer by selecting them both in Layers panel and press CTRL+E to Merge Down. Insert the mask on the layer by choosing Add layer mask on the bottom part of the Layers panel and choose the Soft Round brush of black color (set Opacity to 20% in Options bar).

Use this brush to paint in the mask to hide the next zones on the layer as shown.
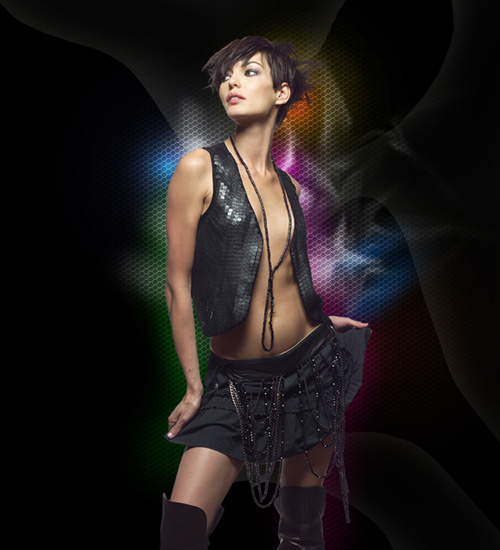
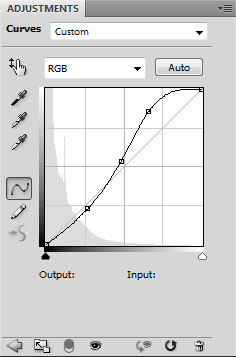
Click Create new fill or adjustment layer from bottom part of the Layers panel and click to Curves to adjust the curve shape as shown to make a little color corrections. This layer will be placed lower than the girl’s layer.
We’ve got the next result:
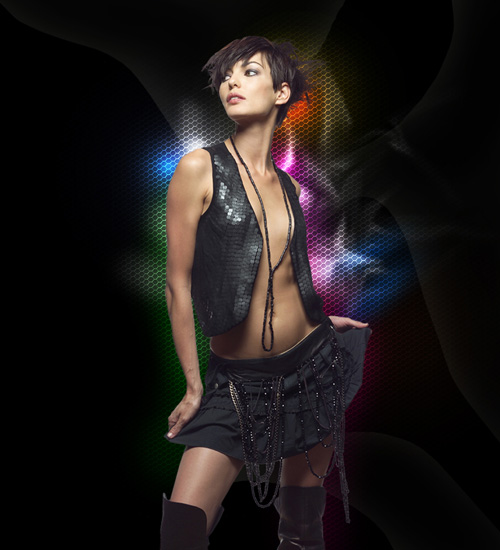
Create a new layer and select the Rectangular Marquee Tool (M) to create the next selection. This layer will be situated under the girl’s one.
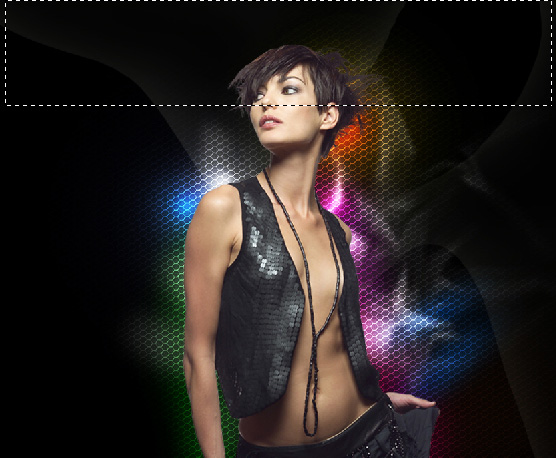
We have to select the Soft Round brush of white color (set Opacity to 15% in Options bar).

Use this brush to paint the bottom part of the selection.

Using Free Transform (Ctrl+T) command, we may place the layer with the line the same way from below.
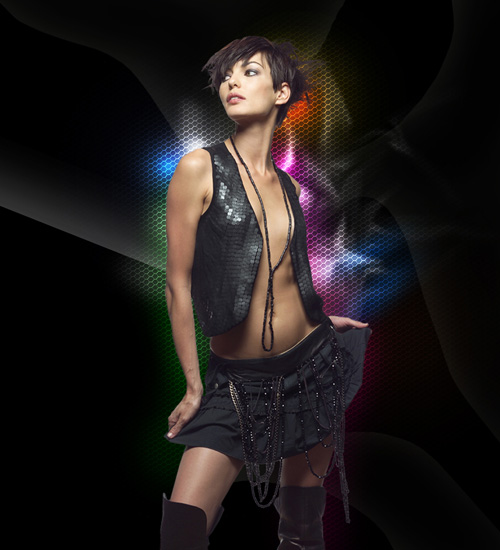
Make two copies of the recently made layer and choose Free Transform (Ctrl+T) command to place the copies as it is shown next picture.
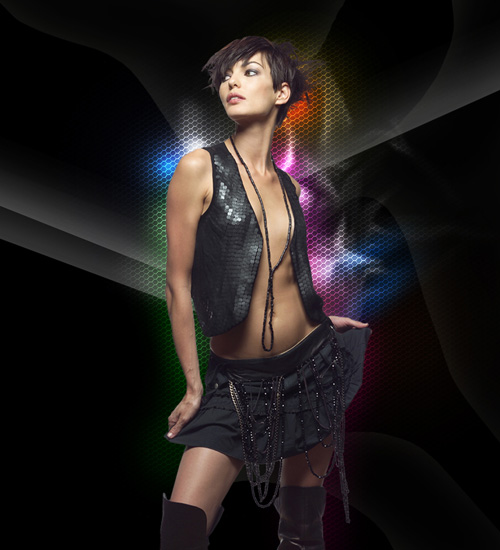
Next we have to combine in a group all those three layers containing the lines (press CTRL button to select the necessary layers and hold on the left mouse’s button while dragging the selected layers on Create a new group icon from bottom part of the Layers panel).
Insert the mask on the group by choosing Add layer mask on the bottom part of the Layers panel and choose the Soft Round brush of black color (set Opacity to 10% in Options bar).

Use this brush to paint in the mask to hide the edges of the lines.

We’ve got the next result:
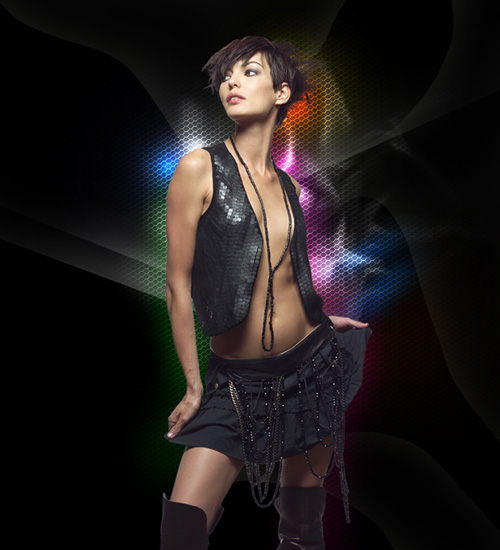
Create new layer and use here the Soft Round brush mentioned above, using the same colors we’ve applied when painting behind the girl. The Opacity value should be on 15% and the layer is situated under the girl’s one.

Set the Blending mode for this layer to Lighter Color.

Create a new layer and select the Hard Mechanical brush of white color.
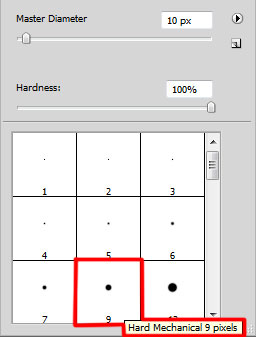
Use this brush to trace lines using SHIFT button, this way we’ll represent a scratches. The layer will be situated under the layer containing the girl.

Click on Add a layer style icon from bottom part of the Layers panel and select Drop Shadow.
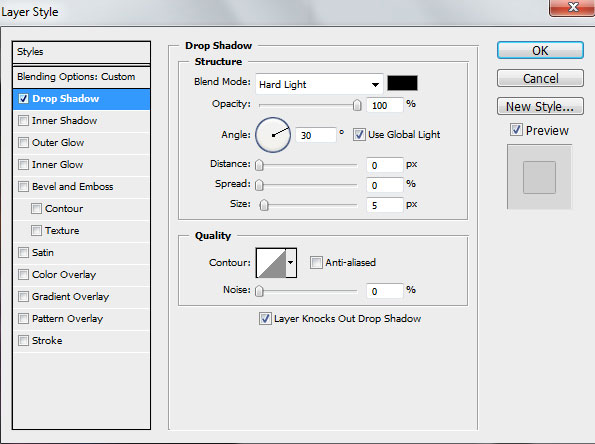
Set the Blending mode for this layer to Soft Light.

Create a new layer again and select for it the same Hard Mechanical brush of white color to represent a series of parallel lines. Place this layer under the girl’s one.

Click on Add a layer style icon from bottom part of the Layers panel and select Drop Shadow.
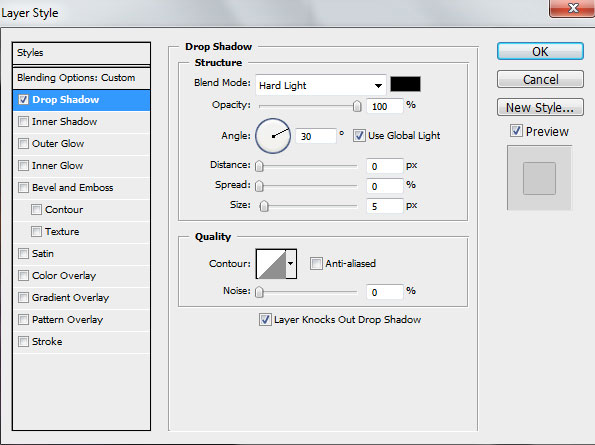
Set the Blending mode for this layer to Overlay.

Insert the mask on the layer by choosing Add layer mask on the bottom part of the Layers panel and choose the Soft Round brush of black color (set Opacity to 20% in Options bar).

Use this brush to paint in mask to hide the lines edges the same way demonstrated below.
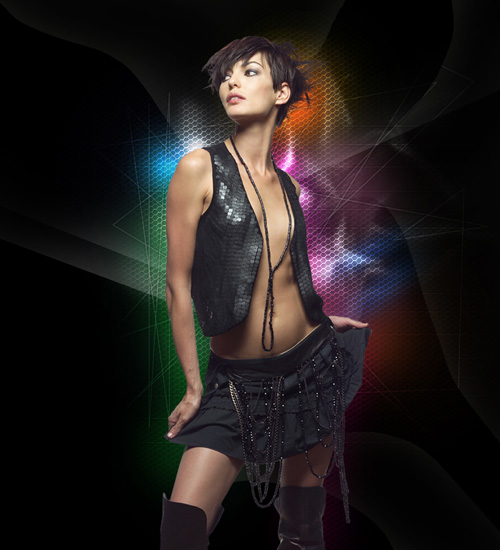
Make a copy of the last made layer and choose Free Transform (Ctrl+T) command to turn over on 90 degrees the copy containing the parallel lines. Add layer mask and hide the lines edges with the same brush mentioned above.

Create a new layer and select the Paint Bucket Tool (G) to fill the layer with black color. Place this layer under the girl’s one.
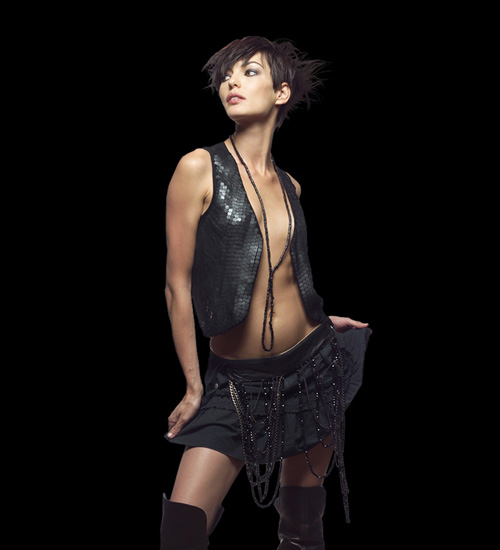
Apply on the same layer the next filter: Filter>Render>Lens Flare
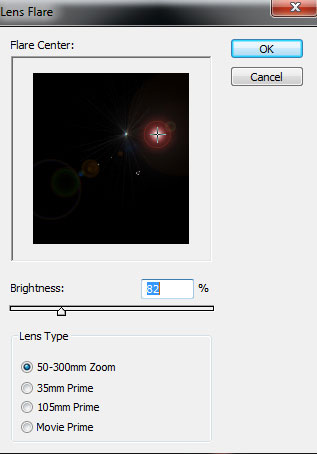
We’ve got the next result:
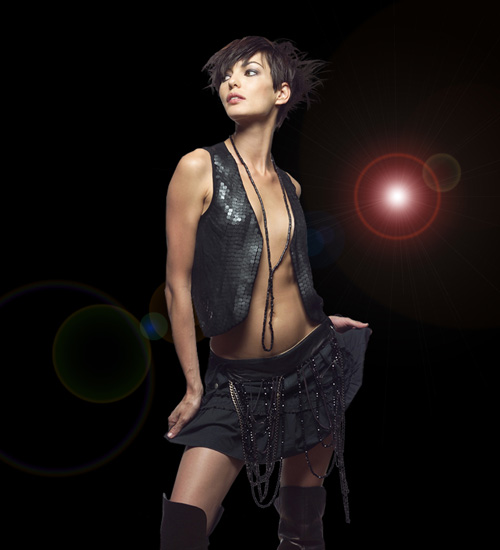
Set the Blending mode for this layer to Linear Dodge.

Final Image Preview

Start working by creating a new document (Ctrl+N) in Adobe Photoshop with the size 1000px by 1000px (RGB color mode) at a resolution of 72 pixels/inch. Use the Paint Bucket Tool (G) to fill with black color the new background layer.

Find a stock photo with a model represented on it, I used this photo from deviantart. I would like to thank the author of this photo, or if you prefer, you can substitute similar image of your own.

Remove the background using your favorite tools like Pen Tool (P), Magic Wand Tool (W), Magnetic Lasso (L) or even a simple Filter>Extract and insert it on a new layer in our main document.

Create a new layer and select the Soft Round brush from Brush Tool (B).

Use this brush to paint the next zones around the girl as shown. Place this layer under the girl’s one.

On the next new layer we’ll apply the same brush to draw two lines. The layer should be placed under the girl’s one too.

Create a new layer and select the Soft Round brush from Brush Tool (B) of bigger diameter this time.

Use this brush to represent a kind of highlight.

Now we have to create a new layer again and use on it the Soft Round brush of white color to add some white spots around the girl. Select after that the Smudge Tool (R) to smudge the white spots as it is shown below. Place this layer under the girl’s layer.

Next we’ll add a pattern on the background, download the Metal Mesh Patterns from deviantart. I would like to thank the author of these patterns:

Copy the pattern file to your Program Files\Adobe\Adobe Photoshop X\Presets\Patterns folder (Adobe Photoshop X been your version of Photoshop).
Create a new layer and set Fill to 0% for this layer, click on Add a layer style icon from bottom part of the Layers panel and select Pattern Overlay. Click the Pattern Preset Picker and Load the pattern file from Program Files\Adobe\Adobe Photoshop X\Presets\Patterns folder. Apply the next settings for Pattern Overlay:

The layer should be situated under the girl’s one.

Create a new layer again which must be filled with #FFFFE0 color using Paint Bucket Tool (G). Place this layer under the girl’s layer.

Insert the mask on the layer by choosing Add layer mask on the bottom part of the Layers panel and choose the Hard Mechanical brush of black color.

Use this brush to paint in the mask to hide the next zones on the layer.

Set Fill to 12% for this layer.

Put together this layer with the new one (Create new layer) into a singe layer by selecting them both in Layers panel and press CTRL+E to Merge Down. Insert the mask on the layer by choosing Add layer mask on the bottom part of the Layers panel and choose the Soft Round brush of black color (set Opacity to 20% in Options bar).

Use this brush to paint in the mask to hide the next zones on the layer as shown.

Click Create new fill or adjustment layer from bottom part of the Layers panel and click to Curves to adjust the curve shape as shown to make a little color corrections. This layer will be placed lower than the girl’s layer.

We’ve got the next result:

Create a new layer and select the Rectangular Marquee Tool (M) to create the next selection. This layer will be situated under the girl’s one.

We have to select the Soft Round brush of white color (set Opacity to 15% in Options bar).

Use this brush to paint the bottom part of the selection.

Using Free Transform (Ctrl+T) command, we may place the layer with the line the same way from below.

Make two copies of the recently made layer and choose Free Transform (Ctrl+T) command to place the copies as it is shown next picture.

Next we have to combine in a group all those three layers containing the lines (press CTRL button to select the necessary layers and hold on the left mouse’s button while dragging the selected layers on Create a new group icon from bottom part of the Layers panel).
Insert the mask on the group by choosing Add layer mask on the bottom part of the Layers panel and choose the Soft Round brush of black color (set Opacity to 10% in Options bar).

Use this brush to paint in the mask to hide the edges of the lines.

We’ve got the next result:

Create new layer and use here the Soft Round brush mentioned above, using the same colors we’ve applied when painting behind the girl. The Opacity value should be on 15% and the layer is situated under the girl’s one.

Set the Blending mode for this layer to Lighter Color.

Create a new layer and select the Hard Mechanical brush of white color.

Use this brush to trace lines using SHIFT button, this way we’ll represent a scratches. The layer will be situated under the layer containing the girl.

Click on Add a layer style icon from bottom part of the Layers panel and select Drop Shadow.

Set the Blending mode for this layer to Soft Light.

Create a new layer again and select for it the same Hard Mechanical brush of white color to represent a series of parallel lines. Place this layer under the girl’s one.

Click on Add a layer style icon from bottom part of the Layers panel and select Drop Shadow.

Set the Blending mode for this layer to Overlay.

Insert the mask on the layer by choosing Add layer mask on the bottom part of the Layers panel and choose the Soft Round brush of black color (set Opacity to 20% in Options bar).

Use this brush to paint in mask to hide the lines edges the same way demonstrated below.

Make a copy of the last made layer and choose Free Transform (Ctrl+T) command to turn over on 90 degrees the copy containing the parallel lines. Add layer mask and hide the lines edges with the same brush mentioned above.

Create a new layer and select the Paint Bucket Tool (G) to fill the layer with black color. Place this layer under the girl’s one.

Apply on the same layer the next filter: Filter>Render>Lens Flare

We’ve got the next result:

Set the Blending mode for this layer to Linear Dodge.


0 comments:
Post a Comment