In this tutorial, I will show the methods I use to create a Dramatic
Meteor and Burning City Effect in Photoshop. This is an intermediate
level tutorial so some steps can be a little tricky for beginners, but
why not have a try!
Here is a preview of the final effect I have for this tutorial: (click to enlarge)
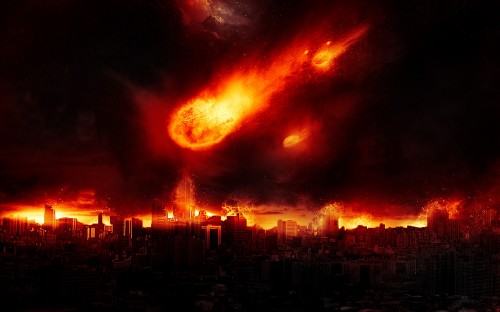

OK let’s get started!
To complete this tutorial, you will need to the following stock:
Sky
City
Rock
Dirty Brush

Copy and paste the selection onto our document, resize it to fit the width of the canvas:
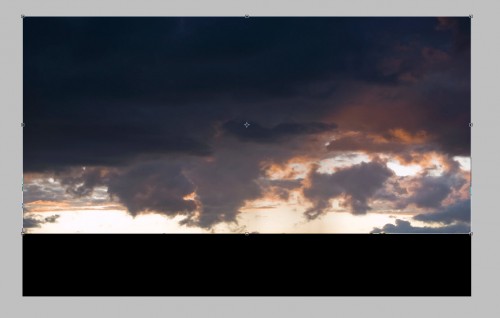
Add the following image adjustment layers as clipping mask to this sky layer:
Black and White

Channel Mixer

Curves

Levels

Erase the upper portion of the sky, and you will have the following effect:


Paste the city onto our document, resize it to fit the width of the canvas:

Add the following image adjustment layers to the city layer as clipping mask:
Black and white

Channel Mixer

Levels

Mask on Levels adjustment layer:
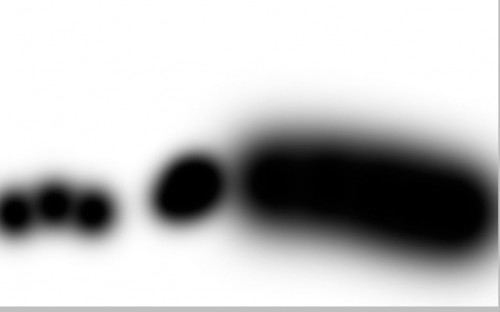
Use a small size soft eraser, erase some portions of the highest buildings, as shown below: (We do this in order to prepare for the burning effect later on)
High-rise 1
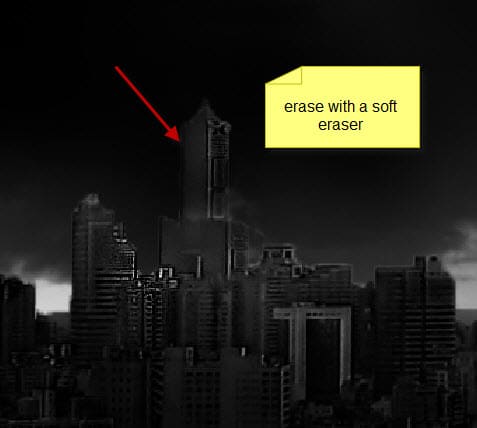
High-rise 2 and High-rise 3

and here is the effect so far:

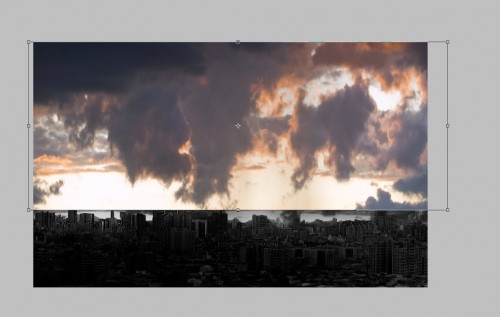
Reduce the layer opacity of this new sky layer to around 50%:

Black and White
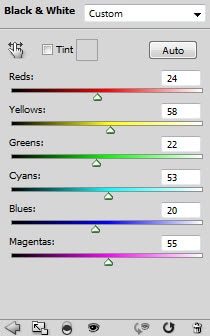
Channel Mixer

Curves

and here is th effect so far:


Paste the selection on to our document, sharpen it a little bit with the sharpen filter:
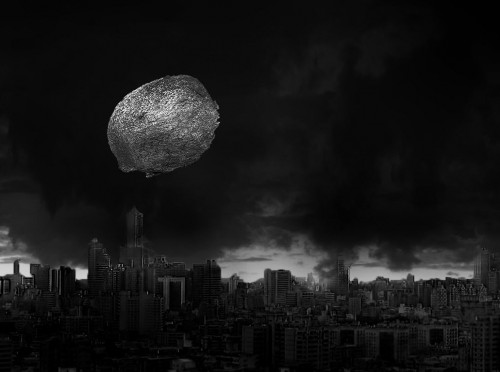
Erase the edges of the rock with a soft eraser:

For your reference, this is the layer mask I added on the rock layer – by mixing soft eraser and grungy brushset:

Apply the following layer blending options to this rock:
Outer Glow

Inner Glow
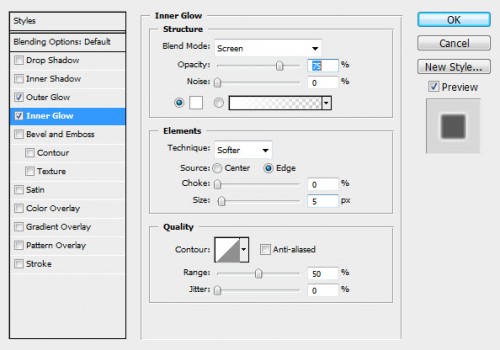
and here is the effect so far:


Optionally, you can add a few more rocks to the image, use the same step described before:
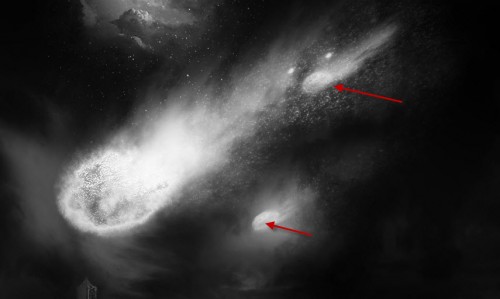
Now you can either render some cloud with the cloud filter, or use some cloud brushes (reduce their sizes) to paint some cloud/smoke BEHIND the high-rises:

Paint some particles with the dirt brush you downloaded:

Also add some cloud overlay to the high-rises on the far distance:

Add a colour balance adjustment layer on top of all layers:


Add a layer mask on this colour balance layer for some variation and increase depth of the image: (we don’t want to the whole image to be red!)

After adding this colour balance layer, you will see those smokes and cloud we added before will transform into flame/burning effect:
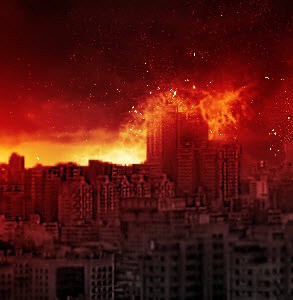
Plus the meteor is now red-hot as well:

And here is the overall final effect: (click to enlarge)

That’s it! I hope you enjoy this tutorial and find it useful! Till next time, have a great day!
Here is a preview of the final effect I have for this tutorial: (click to enlarge)

PSD File Download
You can download the PSD File for this tutorial via the VIP Members Area for only $6.95/Month (or less)! You will not only get this PSD File, but also 70+ other PSD Files + Extra Goodies + Exclusive Photoshop tutorial there. Signup now and get exclusive :) Find out more about the VIP Members Areas
OK let’s get started!
To complete this tutorial, you will need to the following stock:
Sky
City
Rock
Dirty Brush
Step 1
Create a new document sized 1440*900px, fill the background with black colour. Load the Sky image into Photoshop and select a portion as shown below:
Copy and paste the selection onto our document, resize it to fit the width of the canvas:

Add the following image adjustment layers as clipping mask to this sky layer:
Black and White

Channel Mixer

Curves

Levels

Erase the upper portion of the sky, and you will have the following effect:

Step 2
Load the city photo into Photoshop, cut out the city portion of the image as shown below: (use quick selection tool here)
Paste the city onto our document, resize it to fit the width of the canvas:

Add the following image adjustment layers to the city layer as clipping mask:
Black and white

Channel Mixer

Levels

Mask on Levels adjustment layer:

Use a small size soft eraser, erase some portions of the highest buildings, as shown below: (We do this in order to prepare for the burning effect later on)
High-rise 1

High-rise 2 and High-rise 3

and here is the effect so far:

Step 3
I decided to use the sky image again to fill the empty space on the upper side of our document. So let’s copy and paste the sky photo onto our document again:
Reduce the layer opacity of this new sky layer to around 50%:

Black and White

Channel Mixer

Curves

and here is th effect so far:

Step 4
Load the rock image into Photoshop, select one rock from the image – we will use it for the meteor effect:
Paste the selection on to our document, sharpen it a little bit with the sharpen filter:

Erase the edges of the rock with a soft eraser:

For your reference, this is the layer mask I added on the rock layer – by mixing soft eraser and grungy brushset:

Apply the following layer blending options to this rock:
Outer Glow

Inner Glow

and here is the effect so far:

Step 5
We’re almost done. Now we can fine-tune the image a a bit by adding some cloud around the meteor. Make sure you warp/distort them to form a trailing effect: (Hint: if you’re having trouble with cloud warping, take a look at this tutorial)
Optionally, you can add a few more rocks to the image, use the same step described before:

Now you can either render some cloud with the cloud filter, or use some cloud brushes (reduce their sizes) to paint some cloud/smoke BEHIND the high-rises:

Paint some particles with the dirt brush you downloaded:

Also add some cloud overlay to the high-rises on the far distance:

Add a colour balance adjustment layer on top of all layers:


Add a layer mask on this colour balance layer for some variation and increase depth of the image: (we don’t want to the whole image to be red!)

After adding this colour balance layer, you will see those smokes and cloud we added before will transform into flame/burning effect:

Plus the meteor is now red-hot as well:

And here is the overall final effect: (click to enlarge)

That’s it! I hope you enjoy this tutorial and find it useful! Till next time, have a great day!


0 comments:
Post a Comment